Last updated on September 12th, 2022 at 10:08 am.
Contabo is a German cloud hosting platform that provides very affordable VPS solutions . Check out Contabo VPS prices here.
In this post let’s see how to install Ubuntu server on Contabo and then connect to your server via SSH. You may also watch the video above for a step by step guide on how to deploy Ubuntu 20.04 and then connect to your server via SSH.
Related : Ubuntu 22.04 Initial server setup.
How To Deploy Ubuntu on Contabo
Step 1 : Choose VPS Server
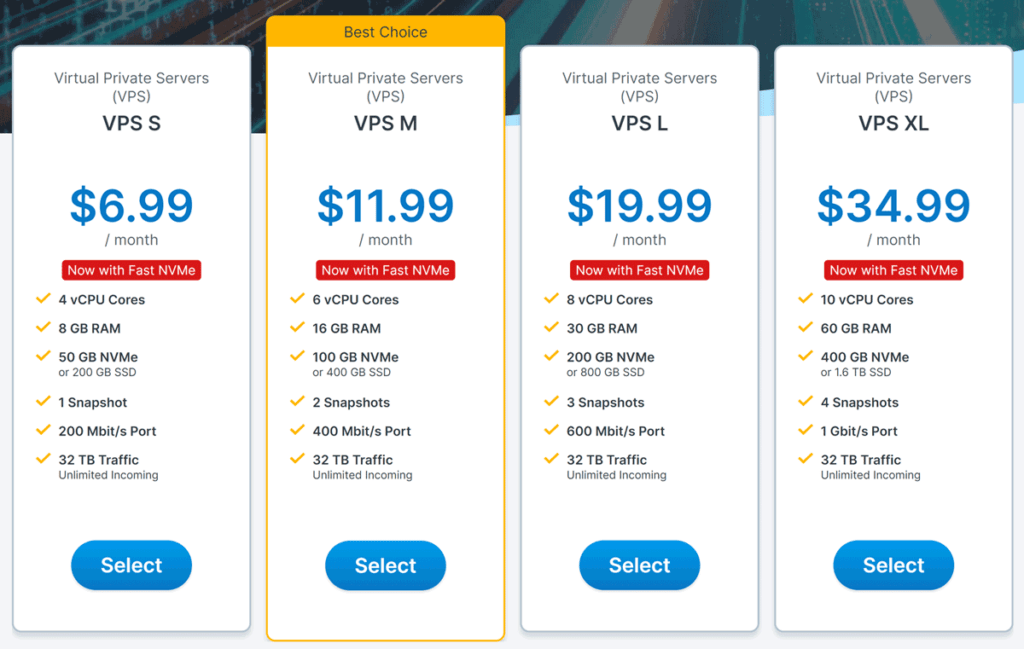
Visit Contabo.com to choose a VPS package. You can start with the smallest package , VPS S ($6.99).
The Conatbo VPS S package features include:
4 vCPU Cores, 8 GB RAM, 50 GB NVMe or 200 GB SSD, 1 Snapshot, 200 Mbit/s Port ,32 TB Traffic and Unlimited Incoming Traffic .
For this illustration I chose VPS S which costs $6.99 per month.
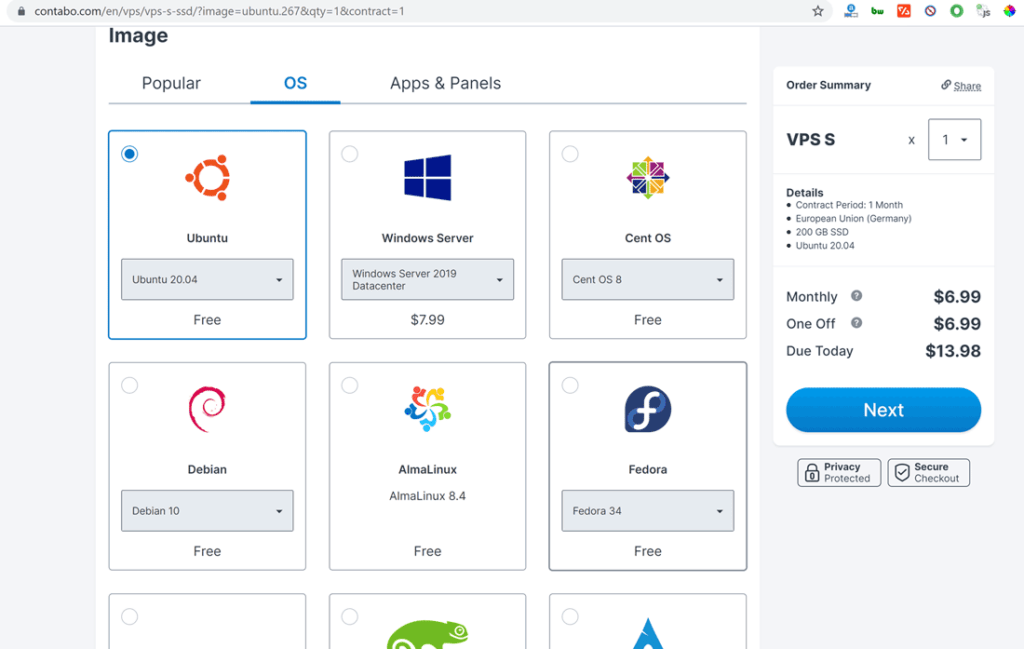
Step 2: Fine tune your Server with all features you need
For your new server you will need to choose :
- Initial Contract Period : By default is one month. You can choose to enter into an annual or semi-annual contract. One month is okay.
- Data Center Region : Server regions outside of Germany cost slightly more.
- Storage Type : Do you prefer NVME or normal SSD. NVME is faster but you get smaller disk space. Choose wisely.
- Image / Operating System : Choose your Server Operating System here . Click on OS and see the available OSes. In my illustration I chose Ubuntu 20.04. OS share.
- Networking / Additional IP : Each additional IP costs $4 . if you need additional IP addresses , the option is here.
- Addons : Leave all these as they are. They may include : additional backup space, Server management (managed or unmanaged), Server Monitoring and SSL.
- Server Quantity : How many Conatbo VPS servers do you need? At the bottom of the screen you can choose to deploy multiple servers.
Before you click next, note that there is a one time setup fee. You can check this on the right side of your server order summary.
Click next to continue.
.
Step 3 : Create New Contabo Account / Login then Pay
If you are a new customer, fill in all the details to create a new account. Once your account is verified all the login information will be sent to you via email.
If you’re a returning customer, click on the, login here link to sign into your account. Once you make your payment, your server login details will be sent to you via email.
Note to new Customers : As a new Contabo customer you will need to verify your physical address. They will communicate this to you through email. This can be done by sending any scanned image of a billing receipt with your name and and address on it. You could use an electric bill , water bill, tax return et.c . As long as the receipt or document has your name and address on it, use it.
Make the payment as needed. The supported payment options will be listed, i.e. : PayPal, Credit/ debit card etc.
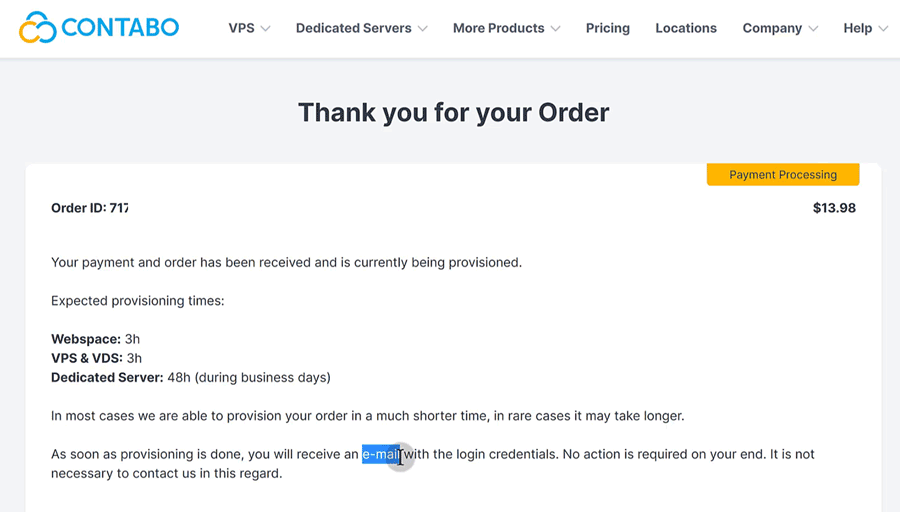
Once you have successfully made your order, you will have to wait for the server to be setup. And the server login details will be sent to your email. The server login details will be sent to your email, that is, your IP, root user and password will be sent via email.
With these details you will be able to connect to your server via SSH. Specifically, you will be able to SSH into your server using the user root, and the password for the root user. Both of which will be sent to your email.
Step 4 : How to connect to your Contabo Ubuntu Server.
Once your account is verified and your server is successfully setup, Conatbo will send you all the login information you need. The login credentials will be sent to your email.
To SSH / connect to your server you will need :
- an IP address
- username , by default will be root.
- password for root .
All the details above are in your email.
To log into your server, watch the Conatbo video tutorial above or continue reading below.
Before you try to SSH into your server, log into your Contabo Dashboard. Then under VPS control, restart your server.
Windows PC users
- Download git for Windows from here. Download the version for Windows. Then install it.
- Search for Git Bash on your start menu. Open Git bash
- Note that your user is root, and your IP has been emailed to you. Your IP can also be found in your Contabo Dashboard .Type the following to login : ssh user@ip-adresss
- Then enter your password
For instance if my IP is 127.0.0.1, I’ll login as follows:
ssh [email protected]
Then enter your password when prompted.
Just like that and you’ll be logged into your server. Ensure you use the correct password for root. The password is in your email along the user, root.
Mac / Linux users
It is still the same as logging in via Git Bash on Windows.
Open up Terminal.
Type in the following to login : ssh user@ip-adresss
Then enter your password
For instance if my IP is 127.0.0.1, I’ll login as follows:
ssh [email protected]
Then enter your password when prompted.
All the above details; IP, username (root) and password were emailed to you by Conatbo.
Just like that and you’ll be logged into your server. If login fails, ensure the password for root is correctly typed or pasted in. The password is in your email along the user, root.
If you are lost or stuck, watch the Contabo VPS tutorial video above or comment below to ask me anything.
Video Captions for the Contabo Ubuntu Video above.
Hi and welcome back to another video. In this video we’re going to set up our Contabo server. We’re going to create the account. If you want to get to this page on Contabo just go to bisanosa.com/contabo . The link is in the description. I will choose this option. You can choose any option that you want. You can even choose any of these other servers. You can use any of these, dedicated server or virtual dedicated server. Whichever one you want to use, go ahead and try it. For me, I want to try to this and this is the one that I’m going to use .
I’ll just click there on select. These are the settings you’re going to get. Initial contract period, there you can choose whichever you want. The region. Just note that with the region, the monthly price is going to vary. The monthly charge for your server is going to vary based on the location of the server. If I choose a data center in the United States you can see the monthly price is going to increase by that. If I choose one in Asia the price is going to increase by three dollars. So just choose one that is most appropriate for you and your visitors. I have chosen this region of Germany.
The next option is, we need to choose an operating system. Okay. Look at all the operating systems that are available here and you can choose whichever one you want to use. For me I want to use Ubuntu 20.04 . But the best option for ubuntu… If you don’t use Ubuntu you can always use Debian. If this was my server I would definitely be using Debian but I’m just using Ubuntu because I know most people prefer to use it and that’s why I want to use it here.
You can see the Linux server operating systems that I recommend. The link will be in the description. I will start with Ubuntu 20.04 , and always use an LTS version. If your VPS doesn’t have 20.04 then just use the latest previous one which is 18.04 but of course you should definitely
use the latest LTS version of Ubuntu and so we’re going to use 20.04 which is the latest Ubuntu LTS version .
And then we’re going to leave that as it is. IP , you can add another IP . If you want to
add an additional IP it will be four dollars a month. So your monthly charges will also increase by that based on the ip addresses that you add.
We’re going to choose only one IP address. And then backup space, if you want to add backup you can do that and the prices are there. If you want your server to be managed by Contabo, you can see that’s the monthly price.
You can monitor your server and see how it’s performing. If anything is happening that you don’t want, any resources are being overused you will get alerts for that.
And you can use SSL if you want to add ssl, but please don’t bother with this because we’re going to install a control panel and with most control panel nowadays you’ll get LetsEncrypt which is already set up in most control panels. So don’t worry about SSL. You can set that up using the free control panel that we’re going to install and then set up. If you want to fast track the setup, you can choose this. This is going to make sure that your account is set up faster. But ,
who cares right? We are patient . We’ll wait . And then, how many servers do you want to set up? If you want multiple servers you can choose the number of servers that you want to set up. Maybe you want to set up multiple servers, you can do that there. That’s pretty much it. Let me just confirm that everything is is as I chose it. So Ubuntu… There, I’ll just go next.
You can see I will need to log in. I already have an account with Conatbo. If you don’t have an account, just go ahead and create yours. And if they ask you for any details to verify your identity, just send them something. You can send them anything that has your actual physical address on it like a billing. Any form of billing that you have, water bill or an electric bill. You can send that . You can just scan it and send it and it will be used to verify your identity. Private individual … Let’s forget about that. I want to log in. I’m already a customer. So if you want to log in, and in future if you want to log into Contabo you can just go to my.contabo.com .
Let’s come in here and do my.contabo.com
enter
and that’s going to redirect you to the login page for Contabo.
When you’re here you can just click here.
Log in here if you’re already a customer. I don’t remember my password I’m going to reset mine here. Just log in and we’ll meet in the next screen. Log in here. Let’s see… once I reset my password, let me come back and log in here.
Okay . I’m logged in. If you have a coupon code just click there and add one. That’s it, you’ll see the amount you should pay. I will just order and pay.
I will just wait for them to finish provisioning the server and as soon as it’s provisioned, what’s going to happen is, you’re going to get all the details that you need to log into your server. You’re going to receive them in your email. Everything that you need will be sent to your email ,and before this happens, let’s say your account is new.
What they will need or what they may need is some kind of a document to prove yourself. Okay? As I said, if they ask you for anything to prove your physical address, just send any kind of billing. You can send an electric bill, water bill or any kind of bill that has your physical address on it. And they will use that to verify you and as soon as you’re verified, they will create your account and will create your server. And all the details will be sent to you. If you don’t want to deal with all this verification stuff, just choose a VPS provider in America.
You can choose something like Vultr. That’s one that I use a lot and I can definitely recommend them. They have very fast servers even though their offers are not as good as Contabo. Let’s just wait and see if it’s going to get provisioned for me as soon as possible.
As soon as you log into your Contabo account once they have sent you all the details you’ll see your servers here.
Any VPSs that you have, any services that you have with Contabo, you can just click there and you’ll see the details for all the servers listed. You can also look at the VPSes that you have right there. They will be listed here. If you did choose VDS then you can look at that as well. Right now there isn’t much I can do. Therefore I’m just going to wait for an email from Contabo and once it comes we can begin setting up the server in the next video. What I’m waiting for is an IP address, a root user and a password. So once all that is set up for me, I can start setting up my server. And as I said, we’re going to use this post to set up our server. Okay. So the link for this will be in the description. If it’s not there, just remind me and I will add it or you can just go to google or bing and search for Bizanosa ubuntu server setup and you’re going to find this post.
As for me, I’m going to use Git Bash to set up my server instead of using PuTTy . You can see this is Putty. I’m not going to use putty, I’m going to use Git Bash. You can just use terminal if you’re on Mac and you can use terminal as well if you’re on Linux. So I will see you in the next video when we start setting up the server I’m just waiting for the details from Contabo. All the details I need will be sent to my email as soon as the server is set up for me.
If you don’t want to deal with all this waiting process from Contabo, you can use a different VPS provider. American VPSs usually don’t have this wait period. An example is Digital Ocean, Vultr. I’ve used both and you can use them if you want to .
If you want to set up a server just to try something go ahead and use Vultr or digital ocean but i do recommend Vultr because I used them for over four years and I still use them to this day, so I can definitely vouch for Vultr. Very reliable, very fast servers as well. It’s entirely up to you to use whichever one you want, but you can also see the VPS’s that I recommend .
so I’ve just received all the login data for my Contabo server. What I got are the IP address, server type, the VNC IP and port. VNC can be used to access your server remotely and then the vnc password as well. And then you’re going to get the username, and the username by default is root. You’re also going to get a password for the root user and the type of operating system that you set up. You’re going to get all of this in your Contabo first email. If your account is new, you’re also going to get your Contabo login details and you can use that to log into your Conatbo dashboard.
We want to log into our server and now that we have all the details, we can do that. We are interested in VPS control because we did set up a vps.
If you don’t know which IP address you’re working with or which is which, just go to your email address and look at the ip address that has been sent there. So you’ll see the operating system and if you are not sure you can also come here under services. All right? If you want to log into your server, the first thing you want to do is make sure that you restart your server. The server will be restarted and as soon as you do that, give it some time. And just copy the server IP address.
We have the IP address. We have the user. Our user is root and we have the password that was sent for root. You can find that in your Contabo email. To log in, so on windows I’m going to use Git Bash. You can download Git bash for free and install it.
If you’re on a Mac or Linux, you can use Terminal to follow along. So just search for Git if you’re on windows that is. Search for gGitt download and then click on that. You want to download it for windows since you are on windows. You’re probably following along on Windows. Choose Windows. Install it and once you install it, it’s going to come with everything we need. We’re going to use Git bash for this tutorial.
Once you install it just come back to Windows and then search for Git. We want to work with Git Bash. You can see there is git gui and there is git cmd but I only want to use git Bash.
To log in, type ssh and the user is root. root@the-ip-address .
With this i think you can paste, let’s see how you can paste. That is @ ,root@ . Then you can paste and you can do shift insert to paste, and as soon as I do that ,
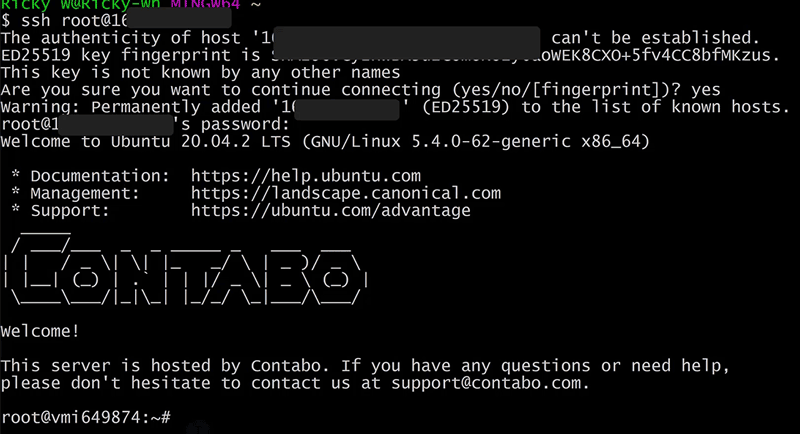
it’s going to ask me for the password. You can see it’s asking me to authorize this into my hosts file.
I’m going to type yes to affirm that.
And it will be added to my hosts file so it will be a known host on my computer and I can i can access it without any problems. We need to add the password. You can paste it in here by doing shift insert. If you do that, you can paste using shift insert. Yes!
You won’t see the password as you type it in or as you paste it in.
Just press enter and if it is correct, you should be logged into your server.
There we go that’s how to log into your Contabo
server. Of course the first thing you want to do is, you want to update your server. Since we are still using root, I can just do apt
update. Enter . Let’s see if there are any updates.
All right so you can see four packages can be upgraded. Let’s do apt upgrade to upgrade. Enter . then y . Enter .
Just let it update and that would be pretty much it. So you’ve seen how you can set up your Ubuntu server on Contabo and then log into your Ubuntu server VPS if you want to start setting it up.
Just remember that we are going to start using this post to set up our server.
There we go. Our updates are done. If you want to log out of your server you can just do exit.
And that’s going to log you out of your server . Okay .
Let’s continue in the next video and in the next video what I want us to do is,
I want us to come in here and we are going to create a new sudo user. The link to this post is in the description. There we go .
We’re going to do this in the next video.


I´ve configured the password reset on control panel and my access is still denied!
Try contacting the Contabo support and hope for the best. They usually take a while to reply. Just keep trying to contact them.
Hello,
Can you make a tutorial about to set SSH-public key? Let’s say you forgot to choose the OS before, and then want to setup manually, is it possible?
Thank you
The tutorial you are looking for already exists.. feel free to checkout :
https://bizanosa.com/setup-linux-server-vps-using-git-bash/