Last updated on December 27th, 2022 at 03:32 pm.
How to Deploy Ubuntu on Hetzner Cloud and log in via SSH.
To deploy Hetzner Ubuntu VPS, watch the video below or read the post that follows.
Step 1: Create a Heztner Account
Before you can deploy Ubuntu on Hetzner Cloud, you need an account.
#1 Go to hetzner.com.
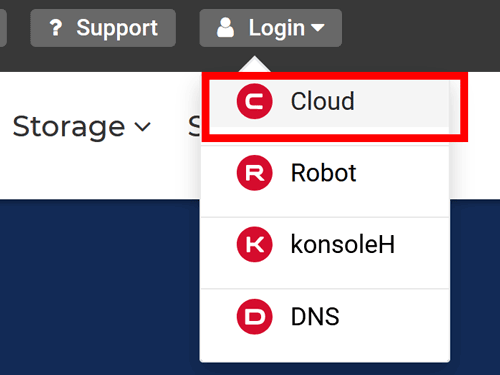
#2 on the top menu, click on Login >> Cloud.
Related Post : Ubuntu 22.04 initial setup on a VPS server
#3 If you have an account, then log in. Otherwise click on the Register Now button to create your account.
#4 Enter your email Address , password and continue on with the other details.
#5 Once you log into your Hetzner dashboard, you may be required to verify your identity. Without which you won’t be able to spin up a server. Click the prompt to begin identification. You will need to take a picture of your Government issued ID or passport. If it fails, keep trying.
Once your identity is verified, you can spin up the Ubuntu server as follows.
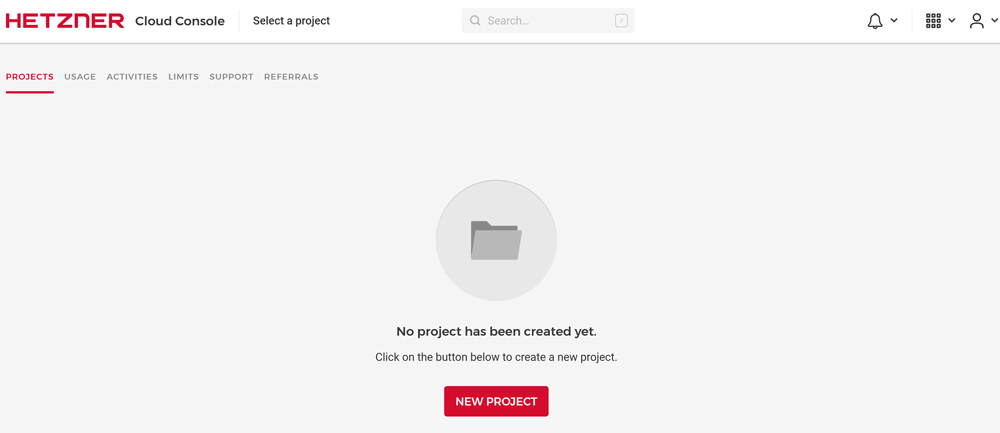
Below is a screenshot of your Cloud Console. This is where you can spin up servers, Load balancers, IPs and so on.
Step 2: Deploying Ubuntu server in Hetzner Cloud
Cloud is the VPS product of Hetzner.
Once you log into your Cloud console, aka , your admin dashboard, you will need to create a project.
A project is a grouping of all your VPS products and any other products such as IPS and so on. The server you deploy will be listed under a particular project.
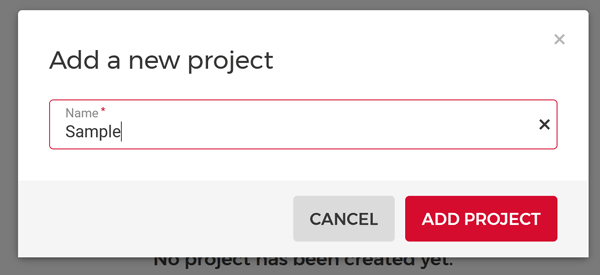
#1 Click on the New Project button, give it a name and click on the Add Project button.
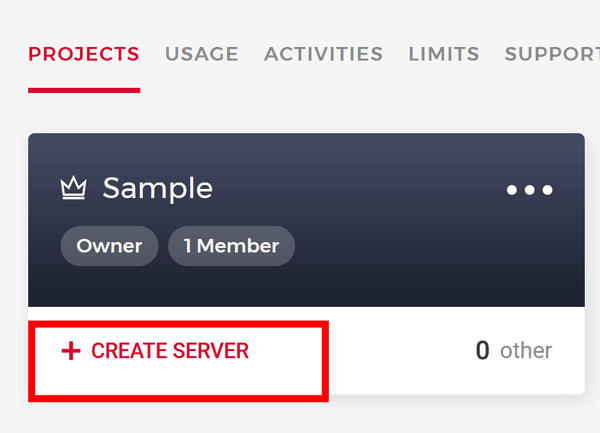
#2 Once your project is created, click on Create Server.
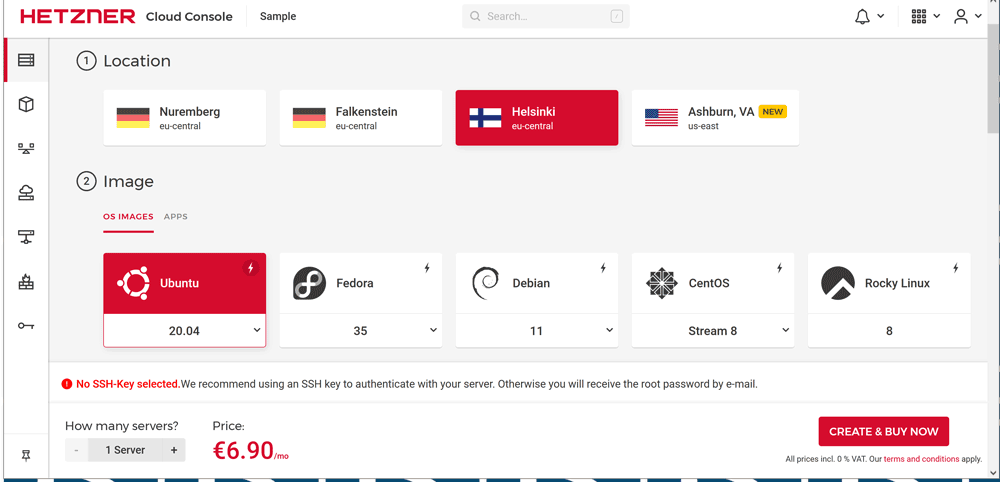
#3 Add all your server details and then finally click on the Create & Buy Now button. For a detailed explanation for the server items and choices, feel free to watch this elaborate Heztner Ubuntu video (YouTube).
#4 Step 4 Log into your VPS server via SSH.
To log into your server, you need an SSH app on your computer. If you are on a Mac, use Terminal. If you are on any Linux distro, also use Terminal.
If you’re on Windows, download Git so that you can use Git Bash. Download git from the official Git-scm.com website. When installing Git, just go with all the default options . They may seem to be many, however, just choose the default install options.
Then open up Git bash on WIndows. Git bash is like Terminal. It allows you to run Linux commands on your Windows.
Related : How To Run WordPress on a VPS using Nginx and PHP-FPM.
Logging into the Server via SSH
All your login credentials will be emailed to you.
Open up Git Bash or Terminal, depending on your machine.
Type in :
ssh user@ip
For instance if your user is root and your IP is 1.1.1.1 , then type it as:
ssh [email protected]
Then enter your password.
All your login details will be emailed to you by Hetzner.
Once you log in, you may get a prompt to change your password. Change it. Using passwords is not advised, so go ahead and watch my tutorial for how to set up SSH key authentication on any Linux server.


