Last updated on September 12th, 2022 at 10:07 am.
In this post you’ll deploy an Ubuntu 22.04 Vultr VPS server . In the upcoming post you’ll see how to set up the Ubuntu 22.04 server to make it ready for production. These are the minimal steps you need to take before using your server in a production environment.
This post will cover the first part which is how to deploy an Ubuntu 22.04 VPS on Vultr. However, you may use this same guide to deploy Debian 10/11, Ubuntu 20.04, CentOS, AlmaLinux, Rocky Linux and so on.
Step 1 : Deploy Ubuntu 22.04 Vultr server
First you need to head over to Vultr to deploy a server. Here is $100 Vultr Credit to get started with.
Go to Vultr and create an account. Once you are on the Vultr dashboard follow the steps below to deploy your server.
Note: My screenshots are in dark mode. You can switch to dark mode in your Vultr admin dashboard by going to Account > Preferences.
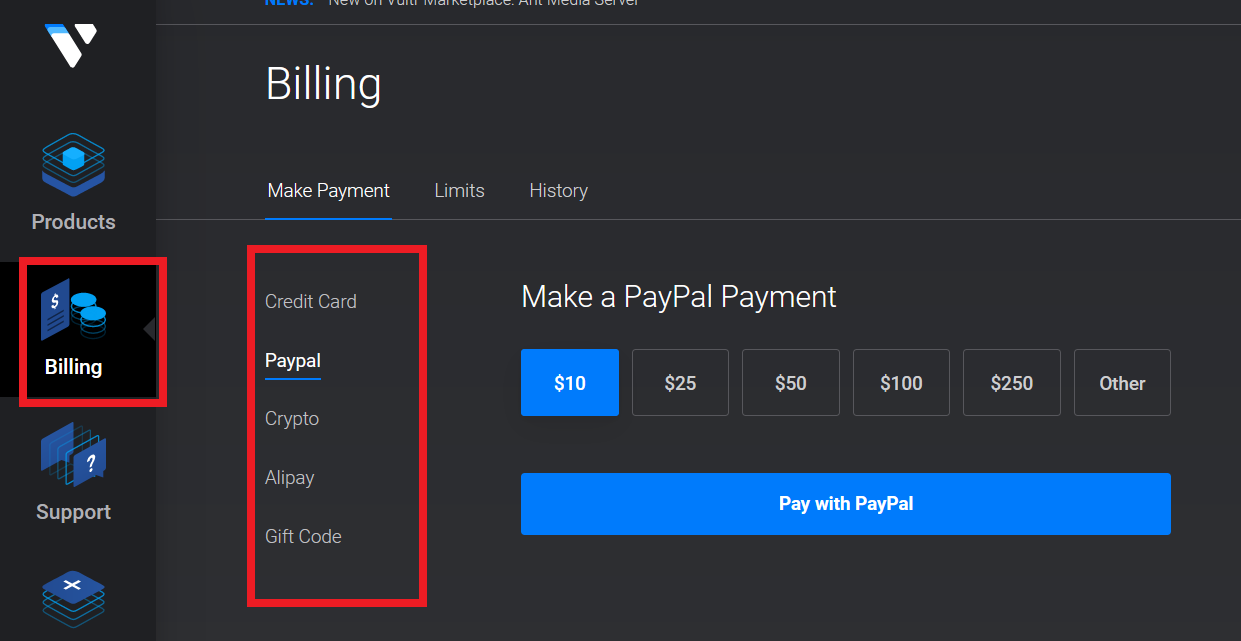
#1 Billing method –
You need to add a billing method first before you can deploy any server. Click on billing and add any billing method you prefer.
#2 Deploy Server
To deploy a new server, go back to the Products page, and then click on the Deploy Server button. Or you can also click on the + button and deploy any Vultr resource.
Click on Deploy New Server.

Then choose the server specifications. There are different server types you can choose here.
How to Choose a Vultr server
Vultr has introduced more server products. If you are new to cloud / VPS hosting you may get confused. In this Vultr products post, I did explain the different server products they offer.
In brief, Vultr has the following servers:
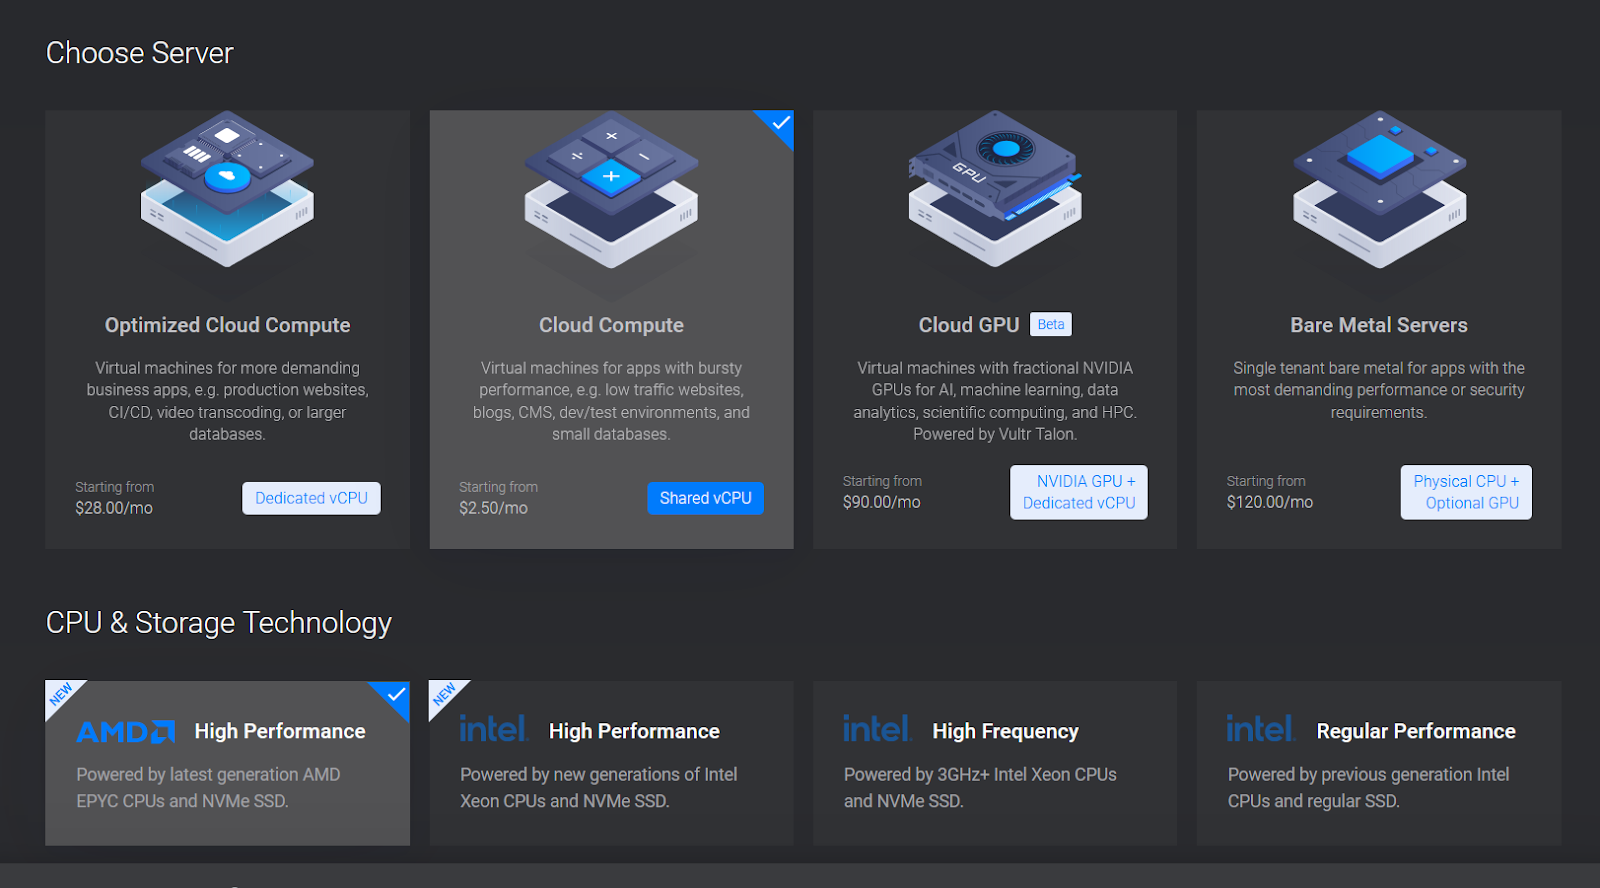
- Optimized Cloud Compute – VPS with dedicated vCPU. Are more expensive than cloud compute because they are dedicated virtual computers. There are different options to choose from based on your system needs.
- Cloud Compute – VPS with shared vCPU. These are simply VPS servers. They come with different options. For a production environment, choose the Vultr High Performance or the High Frequency servers.
- Bare Metal – Dedicated physical CPUs for rent. Rent a dedicated server with no virtualization on it.
Read more about the Vultr Server products here.
If you want to host WordPress, just go with the High performance servers for either AMD or Intel.
Example : Deploy a High Performance Cloud Compute server
I will deploy an AMD High Performance Cloud Compute VPS.
#1 Deploy New server – Click on the Deploy New Server button or the plus button in your admin area.
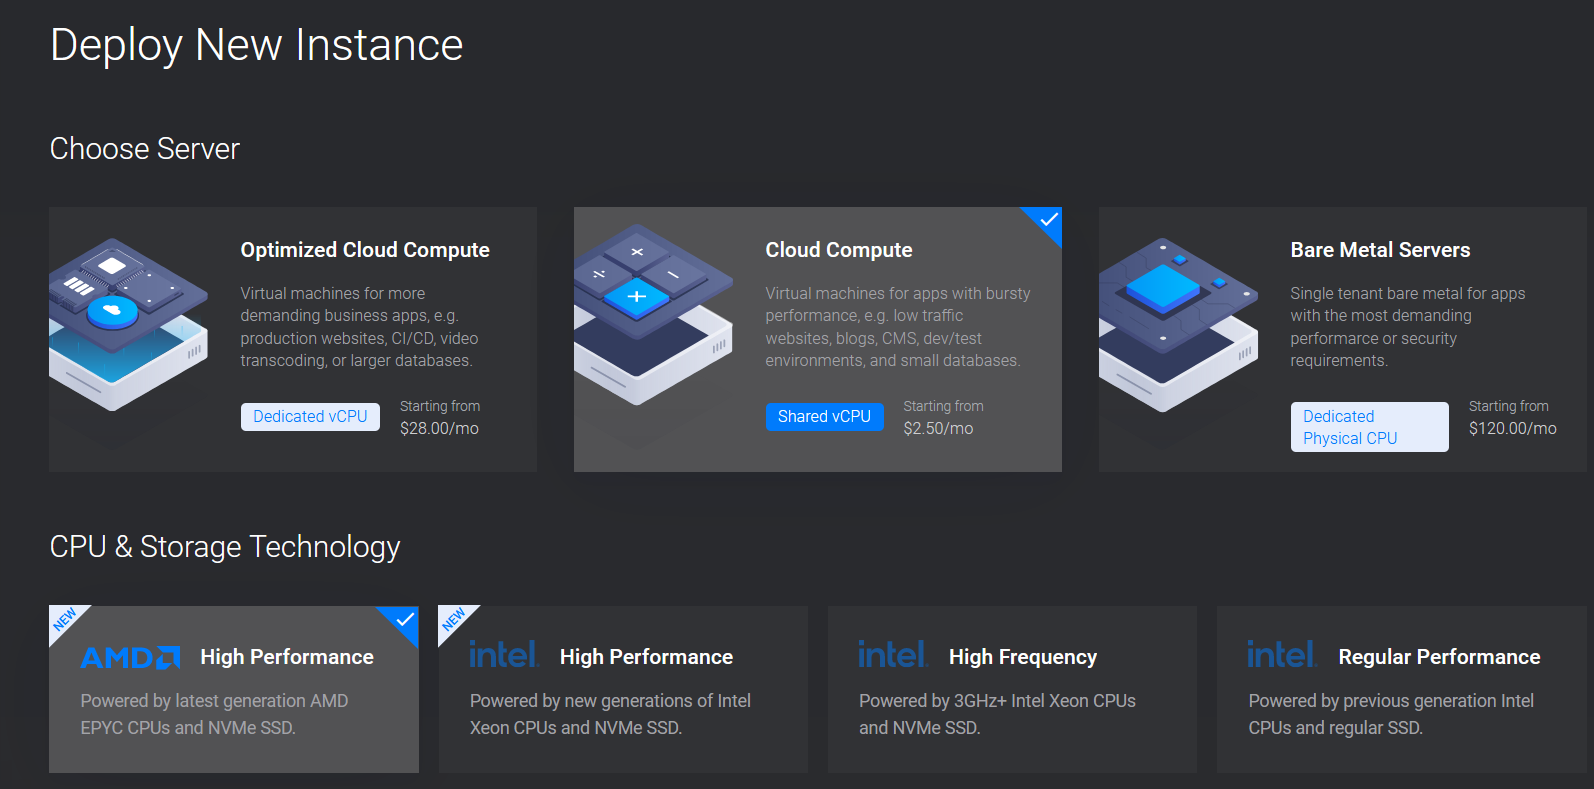
#2 Choose a Server – Under choose server, Click on Cloud Compute .
Then under CPU & Storage Technology, choose AMD High performance as shown in the screenshot below.
#3 Choose a Server Location – Choose a location based on your target visitors. If most of your website visitors will be in Europe, then choose the most central data center location in Europe. If you want to host a local business in Chicago, by all means, choose the Chicago data Center. The available locations as of this writing are:
America:
- Miami
- Atlanta
- Chicago
- Dallas
- Honolulu
- Los Angeles
- New York (NJ)
- Seattle
- Silicon Valley
- Toronto Canada
Europe:
- Stockholm, Sweden
- London, United Kingdom
- Amsterdam, Netherlands
- Frankfurt, Germany
- Paris, France
- Warsaw, Poland
Australia
- Sydney
- Melbourne
Asia
- Tokyo, Japan
- Seoul, South Korea
- Singapore, Singapore
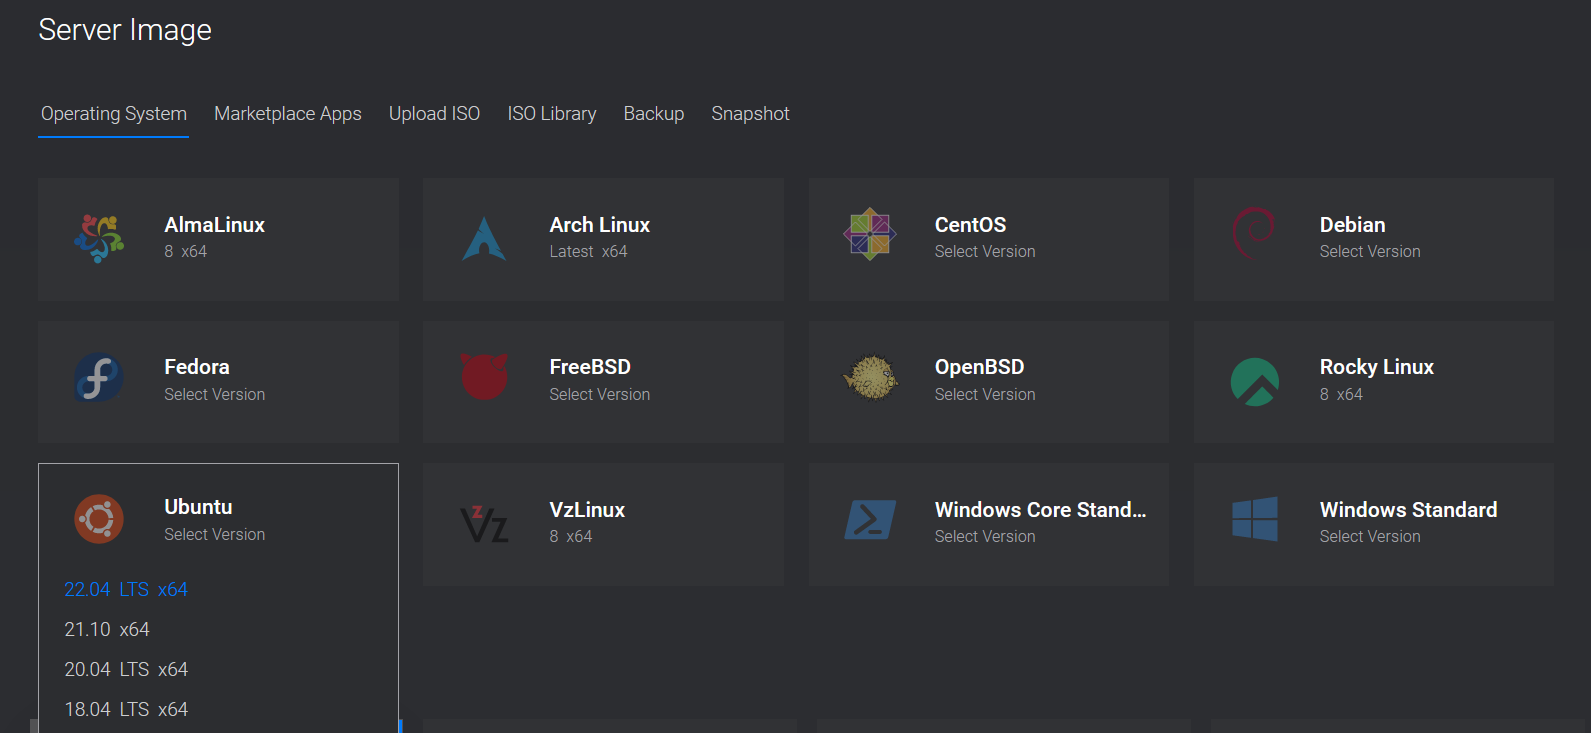
#4 Server Image OS/Application – Choose an application or OS for your server. Since this post is about Ubuntu 22.04, that’s what I will choose. Click on any OS or app to choose a specific version.
You can install any of the following options:
- Operating Systems : You can install Linux distros or Windows Server.
- Marketplace Apps : Install ready to go apps such as Plesk, Cpanel, WordPress, LEMP stack, docker and so many more. Utilize the search feature to find the app you’re looking for.
- Upload ISO & ISO Library – Upload your ISO image on Vultr or just use an ISO from the Vultr ISO Library.
- Backup & Snapshots – Do you have a backup or a snapshot you want to install from? Use the credentials for the backed up server to access the new server
As I said, I will choose Ubuntu 22.04 as my server as shown in the screenshot below.
#5 Server size – Choose a server based on your budget and the system you want to run. If you are installing Apache as your Web server ensure you choose a server with at least 2GB of RAM. As for Nginx, 1GB RAM and above is ok. You can always upgrade your server within your dashboard.
# 6 Enable Auto backups : You may enable Automatic backups. It will add a cost of 20% to your server costs.
#7 Additional features : Some additional features you have the option of enabling for your server are listed below.
- IPv6 – You can enable IPV6 for your server.
- DDoS protection – Enable the Vultr Denial of Service mitigation system for $10 p.m.
- Cloud init – Do you have scripts you want to run as soon as your server is set up ? Read more about startup scripts here.
- VPC – You can enable Virtual Private Cloud. VPC allows your different instances on the same VPC network to talk to each other. This is a must have feature for Manual Multi-node Kubernetes cluster Setup.
#8 Firewall group – You can set up firewall rules that you can apply to multiple servers.
#9 Server Hostname & Label – Enter a server Hostname. If you are deploying a server for hosting a website or sending mail, ensure you use a fully qualified domain (FQDN) as your hostname. An FQDN could be a full domain such as example.com or a subdomain such as sub2.example.com .
The label is simply the recognizable name for your server. Make it recognizable so that you can differentiate it from other deployed servers in your account.
#10 Deploy server
Go through all the settings you have chosen for your server and confirm if they reflect your desired server features.
Note that you can deploy multiple servers with the same features. Do this under the Servers QTY area.
Once you are ready to deploy the server , just click on Deploy Now.

That is how to deploy an Ubuntu 22.04 Vultr server or any other OS server.
To log into your Ubuntu 22.04 server via SSH
Once you deploy the Ubuntu 22.04 server, download Git bash from Git – Downloads (git-scm.com) . Download it and install the full Git software.
If you are on a Mac or Linux, just open up Terminal. You don’t need to install Git Bash.
On Windows, after installing Git, open up the start menu and search for Git Bash. Open it.
Now you can Log into your server. The login credentials will be shown on your VPS admin dashboard. Just copy them. You need the password, IP and user (root).
By default the user will be root. In the following example, you are logging in as root.
Log into your Ubuntu VPS Server via SSH using Git Bash by typing in the following:
ssh root@server-ip-address
Enter your password and you will be logged in.
Let’s say your IP is 127.0.0.1, then you’ll log in as follows:
ssh [email protected]
Then copy and paste your password from Your Vultr Dashboard.
Conclusion
That’s it. In this post you have seen how to deploy an Ubuntu 22.04 server on Vultr. You can follow this guide in deploying any other server OS available in Vultr. The key point is to know which server to deploy.
If you have any questions ask me in the comments below.
Related: Setup Linux Server VPS using Git Bash on Windows – Debian 10 / Ubuntu 20.04


